
Keep Your Home Cool: Mini Split Cleaning Tips
Keep your home cool with these essential mini split cleaning tips. Learn efficient ductless AC maintenance for optimal performance and comfort.


How to Clean a Ductless Mini-Split Unit
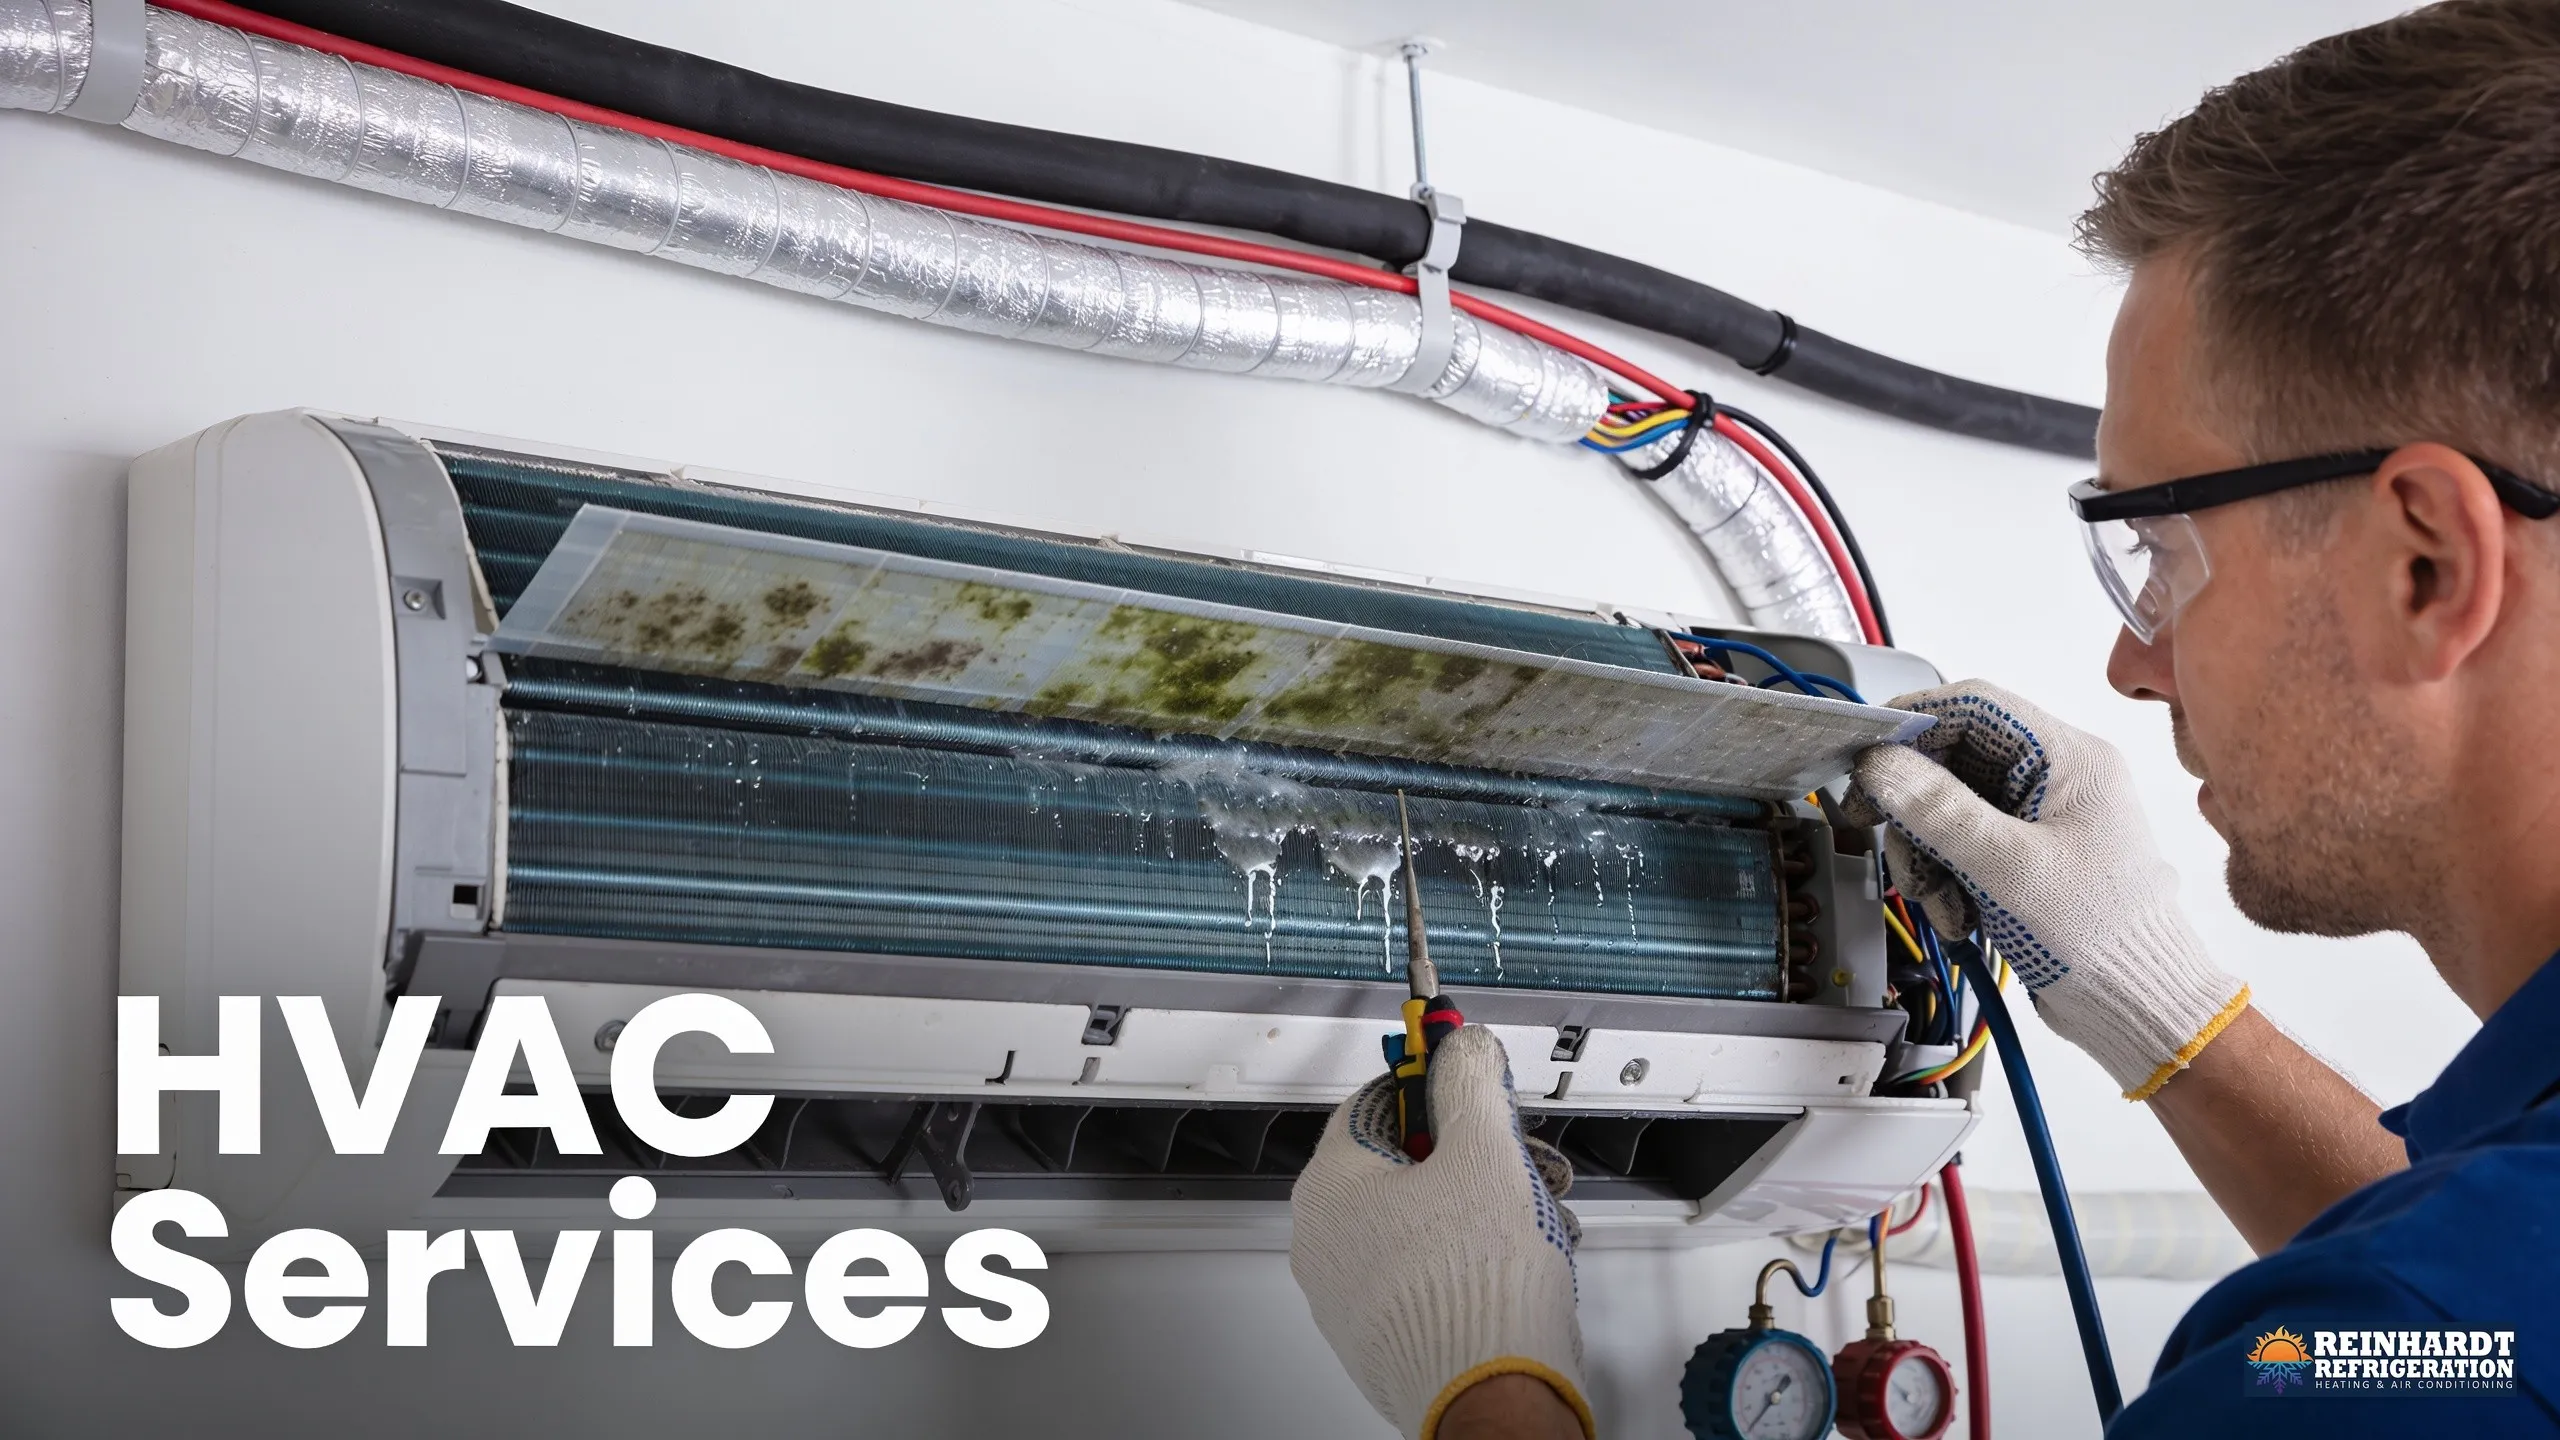
Cleaning a ductless mini-split unit requires turning off the power, removing and washing the filters with warm water every two weeks, wiping the indoor unit's exterior with a damp cloth, and clearing debris from the outdoor condenser. At Reinhardt Refrigeration Heating and Cooling, we recommend scheduling a professional deep cleaning annually to maintain peak efficiency and protect your investment. Cleaning a ductless mini-split unit involves five key steps: rinse the air filters with warm water, wipe down the indoor unit's exterior, clean the evaporator coil with a soft brush, clear the condensate drain line, and inspect the outdoor unit for debris. Routine maintenance prevents costly repairs and preserves peak efficiency throughout every season. Routine ductless mini-split cleaning starts with powering off the unit completely — remove and rinse the air filters, then wipe down the indoor head unit's exterior, and use a flashlight to inspect the blower wheel and vents, as these areas collect significant dirt buildup over time.
Key Takeaways
• Regular mini-split maintenance prevents mold buildup, reduces odors, and extends the system's overall lifespan. Staying on a consistent cleaning schedule is one of the most effective ways homeowners in Duchesne, UT can protect a long-term comfort investment.
• Shining a flashlight into the air outlet reveals hidden dirt and debris inside the unit. Most homeowners are surprised by how much buildup accumulates in areas that are not visible during a casual inspection.
• Mold and mildew growth inside mini-split heads directly reduces efficiency and increases repair frequency. Addressing biological growth early keeps indoor air quality high and prevents the problem from reaching components that require professional attention.
• Reinhardt Refrigeration Heating and Cooling recommends routine cleaning as a cost-effective maintenance strategy. Pairing homeowner cleaning with our annual professional service gives every system the best chance of a long, reliable service life.
Why Does a Mini-Split Get So Dirty?
Ductless AC maintenance starts with understanding why these systems accumulate grime so quickly. Mini-splits draw warm room air across cold, moisture-covered coils — a combination that turns the interior of each wall unit into a magnet for dust, debris, and biological growth.
What Makes Mini-Split Filtration Different From Central HVAC?
Mini-splits rely on thin filters that do not fit tightly across the coil surface, allowing dirty air to slip past the filter edges and contact cold, wet internal surfaces. Once airborne particles hit those surfaces, they stick — and central ducted systems use thicker, frame-sealed filters that block far more particulate before it ever reaches the coil.
What Happens When Buildup Goes Unchecked?
Mold and mildew take hold quickly on damp coil surfaces, and once established, that biological growth produces unpleasant odors and forces the system to work harder to move air through clogged components. The consequences compound fast:
• Reduced efficiency — restricted airflow makes the unit run longer to reach the set temperature, steadily driving up energy use month after month. Over time, the cumulative impact on utility bills becomes a noticeable and entirely avoidable financial burden.
• Unpleasant odors — mold spores circulate directly into the living space every time the fan runs, affecting indoor air quality for everyone in the home. Persistent odors are often the first sign that biological growth has advanced beyond what surface cleaning can address.
• Potentially significant repairs — strained components wear out ahead of schedule, and the repair investment grows substantially the longer buildup is left unaddressed. What begins as a minor maintenance gap can escalate into a major service event that disrupts comfort at the worst possible time.
• Premature system failure — neglected units break down well before the end of their expected service life, requiring full replacement far sooner than necessary. Consistent cleaning is the single most effective way to protect the full value of the original investment.
Longer run times drive up energy bills steadily, and a system that never gets cleaned essentially penalizes the homeowner on every utility statement. DIY mini-split care and routine mini-split cleaning interrupt this cycle before it escalates. At Reinhardt Refrigeration Heating and Cooling, we recommend treating regular cleaning not as optional upkeep, but as the first line of defense against avoidable breakdowns — and our Seasonal AC Maintenance for Peak Performance guide walks through the broader maintenance calendar every homeowner in Duchesne, UT should follow.
What Tools and Materials Do You Need First?
Mini-split cleaning starts with one non-negotiable prerequisite: power off the unit completely before touching any component. Gathering the right supplies before starting ductless AC maintenance prevents mid-task interruptions and keeps the work safe and efficient.
Why Does Turning Off the Unit Matter Before Cleaning?
Shutting down the system is the essential first safety step — running components can cause injury and damage delicate parts if disturbed mid-cycle. Our team at Reinhardt Refrigeration Heating and Cooling always emphasizes this step before any hands-on service work begins.
What Supplies Should Homeowners Have Ready?
Before starting DIY mini-split care, gather these materials:
1. Power switch or remote — confirm the unit is fully off at the thermostat or breaker before proceeding. Verifying shutdown at both points eliminates any risk of the system cycling on unexpectedly during cleaning.
2. Soft-bristle brush or dry cloth — for loosening surface dust from filters and housing without scratching or damaging delicate mesh or fins. A gentle touch preserves component integrity and prevents the need for premature parts replacement.
3. Mild detergent and warm water — for washing reusable filter panels thoroughly. Avoid harsh chemical cleaners, which can degrade filter material and leave residues that affect air quality.
4. Clean towels or microfiber cloths — for drying components before reassembly to prevent moisture from being sealed inside the unit. Trapped moisture is a leading contributor to mold growth in mini-split interiors.
5. Flashlight — to inspect the interior blower area for hidden buildup that is impossible to see with the naked eye in a dim cavity. A thorough visual inspection before cleaning gives a clear picture of what the job actually requires.
6. Protective gloves — to keep hands clean and protected during the process. Gloves also prevent skin oils and contaminants from transferring onto cleaned components.
Having every item staged before opening the unit keeps the job moving without shortcuts. Routine maintenance is one of the most cost-effective ways to prevent larger issues from developing — a few minutes of preparation protects the system and extends its working life considerably.
How Do You Clean the Air Filters Safely?
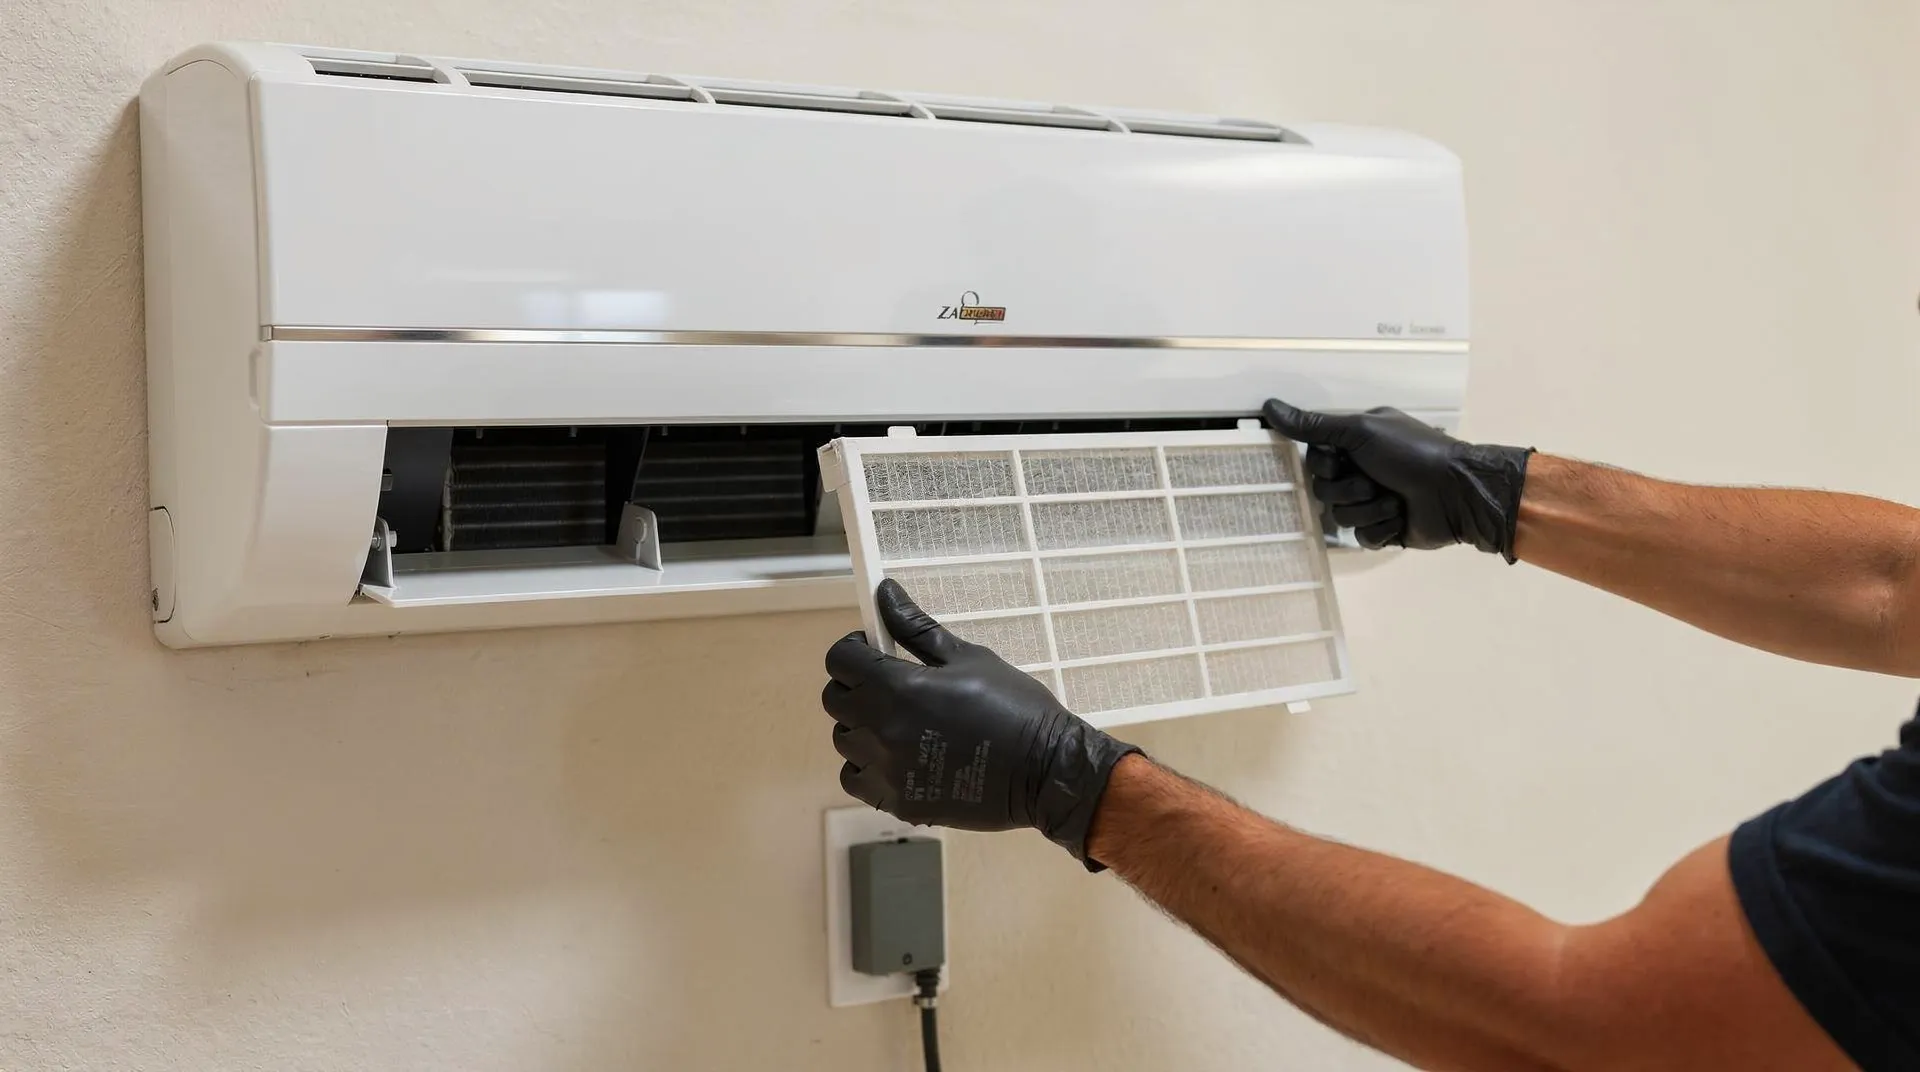
Mini-split cleaning starts with the air filters — the single most accessible maintenance task a homeowner handles without professional help. Filters on ductless systems need cleaning every four to six weeks to preserve efficiency and extend the life of the equipment. Ductless systems generally demand less upkeep than traditional ducted setups, but filter cleaning remains a non-negotiable constant — skip it, and restricted airflow forces the system to run longer, driving up energy use and accelerating wear on internal components. Prerequisites: Power the unit off at the thermostat and at the breaker before touching any internal component. Follow these steps in order:
1. Open the front panel. Lift or swing the cover upward — most panels release with a gentle pull along the bottom edge. Avoid forcing the panel, as clips can break if pressure is applied at the wrong angle.
2. Slide the filters out. Pull each filter straight toward you, avoiding bending or creasing the mesh. Damaged mesh allows unfiltered air to pass directly onto the coil surface, accelerating buildup.
3. Tap loose debris free. Hold the filter over a trash bin and tap the frame lightly to dislodge dry dust. This step reduces the amount of debris that enters the rinse water, making the wash more effective.
4. Rinse under lukewarm water. Run water through the back of the filter so debris flushes outward, not deeper into the mesh. Pressing debris further in during rinsing clogs the filter permanently and requires replacement.
5. Air-dry completely. Lay filters flat in a well-ventilated area — never reinstall a damp filter, as moisture inside the unit promotes mold growth and can cause odors to develop quickly.
6. Reinstall and restore power. Slide filters back into their tracks, close the panel, and restore power at the breaker. Confirm the unit starts normally and airflow feels consistent before leaving the area.
How Often Should Mini-Split Filters Be Cleaned?
Every four to six weeks is the standard interval for most households. Homes with pets, high dust levels, or heavy daily use benefit from cleaning closer to the four-week mark, as airborne particulate accumulates significantly faster in those environments.
Is DIY Mini-Split Care Enough for Filter Maintenance?
DIY mini-split care covers filter cleaning reliably — it is one of the few tasks manufacturers consistently flag as homeowner-friendly and safe to perform without specialized tools. Ductless AC maintenance beyond filters, such as inspecting refrigerant levels or deep-cleaning coils, requires a trained professional from our team at Reinhardt Refrigeration Heating and Cooling serving Duchesne, UT.
How Do You Clean the Indoor Evaporator Coil?
Ductless AC maintenance on the indoor evaporator coil starts with a careful inspection — most homeowners are surprised by how much buildup hides inside the unit. Without a flashlight aimed up into the air outlet, the true condition of the coil and blower wheel stays completely invisible. Neglecting the evaporator coil forces the system to work harder, strains internal components, and shortens equipment life. A thorough mini-split cleaning of the indoor unit eliminates odors, relieves system strain, and extends the lifespan of the equipment. We at Reinhardt Refrigeration Heating and Cooling recommend treating this task as a non-negotiable part of your seasonal maintenance routine — schedule your annual service before peak season arrives so we can handle what goes beyond a DIY clean.
What Do You Need Before Starting the Coil Cleaning Process?
Gather your supplies before opening the unit — working without the right tools leads to incomplete cleaning and potential damage to delicate fins:
• A flashlight to inspect the coil and blower wheel — without it, you are working blind in a cavity that hides significant buildup. Skipping this step means cleaning only what is visible, not what is actually causing performance problems.
• A soft-bristle brush or coil-cleaning brush to loosen debris without bending or crushing the aluminum fins. Bent fins reduce airflow and cannot be fully restored without a specialized fin-straightening tool.
• A no-rinse coil cleaner spray formulated for HVAC evaporator surfaces. General-purpose cleaners can leave chemical residues that corrode fins or degrade the coil coating over time.
• A clean cloth or microfiber towel for wiping accessible surfaces and catching drips after applying the cleaner. Having extra cloths on hand prevents having to stop mid-task to find absorbent material.
• A bucket or absorbent mat placed below the unit to catch drips during the cleaning process. Protecting the floor and nearby surfaces keeps the work area clean and prevents slip hazards.
How Do You Deep-Clean the Evaporator Coil Step by Step?
DIY mini-split care on the coil requires patience and a methodical approach. Follow these steps in order:
1. Power down the unit completely at the breaker — never work on a live system, as contact with energized components can cause serious injury.
2. Open the front panel by releasing the clips or tabs along the top edge of the indoor head. Work gently and note how each tab releases so reassembly goes smoothly.
3. Remove the air filters and set them aside for separate cleaning, as described in the filter section above. Leaving dirty filters in place during coil cleaning reintroduces debris immediately after the coil is cleaned.
4. Shine a flashlight into the air outlet to assess coil and blower wheel soiling before touching anything. This gives a baseline view that helps you gauge how thoroughly the cleaner needs to dwell.
5. Apply no-rinse coil cleaner evenly across the evaporator coil fins, working top to bottom. Overlapping passes ensure full coverage and prevent dry spots where buildup is left intact.
6. Allow the cleaner to dwell according to the product label, then let condensate drainage carry residue away naturally. Rushing this step by wiping too early removes the cleaner before it has fully broken down mold and debris.
7. Wipe accessible surfaces with a microfiber towel and reassemble the panel. Confirm the unit powers on and runs normally before considering the task complete.
Mini-splits perform best when indoor coils stay clean and unobstructed. We at Reinhardt Refrigeration Heating and Cooling recommend pairing this DIY mini-split care routine with a professional annual inspection to catch what a flashlight and brush cannot reach.
How Do You Clean the Blower Wheel and Vanes?
Mini-split cleaning of the blower wheel and vanes demands a thorough, step-by-step approach — mold and mildew build up deep inside the unit where casual wiping never reaches. Skipping this task compromises indoor air quality and forces the system to work harder, shortening its lifespan. At Reinhardt Refrigeration Heating and Cooling, indoor air quality sits at the core of every service we perform for homeowners in Duchesne, UT — we follow a disciplined clean, clear, and check routine that prevents peak-season breakdowns before they start.
What Do You Need Before Starting?
Gather these supplies before opening the unit:
• A soft-bristle brush or dedicated coil brush to scrub the wheel fins and vanes without bending them out of alignment. Using too stiff a brush risks permanent fin damage that reduces airflow even after a thorough cleaning.
• A spray bottle filled with a mild coil-cleaning solution or diluted detergent, which loosens mold colonies without corroding internal surfaces. Always follow the product dilution guidelines, as over-concentration can leave residues that attract dust faster after cleaning.
• Microfiber cloths for wiping away residue and absorbing excess moisture from the cleaned surfaces. Having several clean cloths ready prevents cross-contamination between dirty and cleaned areas.
• A flashlight, because the blower wheel hides in a dark cavity where buildup is otherwise invisible. Checking the wheel's condition before and after cleaning confirms the job was thorough.
• A drip tray or towels placed below the unit to catch runoff from the cleaning solution. Protecting the floor and wall surfaces beneath the unit keeps the work area clean and prevents slipping.
Power the system off completely at the breaker before beginning — never work on a live unit.
How Do You Remove Mold From the Blower Wheel?
Mold colonies on the blower wheel are a common finding during ductless AC maintenance inspections. Left untreated, mold circulates spores directly into living spaces every time the fan runs. Follow these steps in order:
1. Open the front panel and remove the air filters, setting them aside for separate cleaning. Leaving filters in place during blower wheel cleaning allows dislodged debris to resettle on the filter surface immediately.
2. Shine a flashlight into the blower cavity to assess mold and debris buildup before touching anything. This step identifies concentrations of mold that need the most dwell time from the cleaning solution.
3. Apply the cleaning solution directly onto the blower wheel fins and vanes, allowing it to dwell for several minutes to break down mold colonies. Applying the solution generously ensures it penetrates the tightly packed fins where buildup is heaviest.
4. Scrub the wheel and vanes with the soft-bristle brush, working in the direction of the fins to avoid bending them. Methodical, directional strokes produce a more complete clean than random scrubbing, which can push debris deeper into the fin gaps.
5. Wipe away residue with a damp microfiber cloth, repeating until no discoloration remains on the cloth after each pass. Discoloration on the cloth confirms mold is still present — continue until passes come back clean.
6. Dry the cavity thoroughly before reassembling — moisture left behind accelerates future mold growth and can cause odors to return within days of cleaning.
DIY mini-split care handles light buildup well, but heavy mold contamination warrants a professional deep-clean from our team at Reinhardt Refrigeration Heating and Cooling to fully restore air quality and system performance. We serve homeowners throughout Duchesne, UT and encourage clients to reach out and schedule service whenever buildup goes beyond what a standard DIY clean can address.
How Do You Clean the Outdoor Condenser Unit?
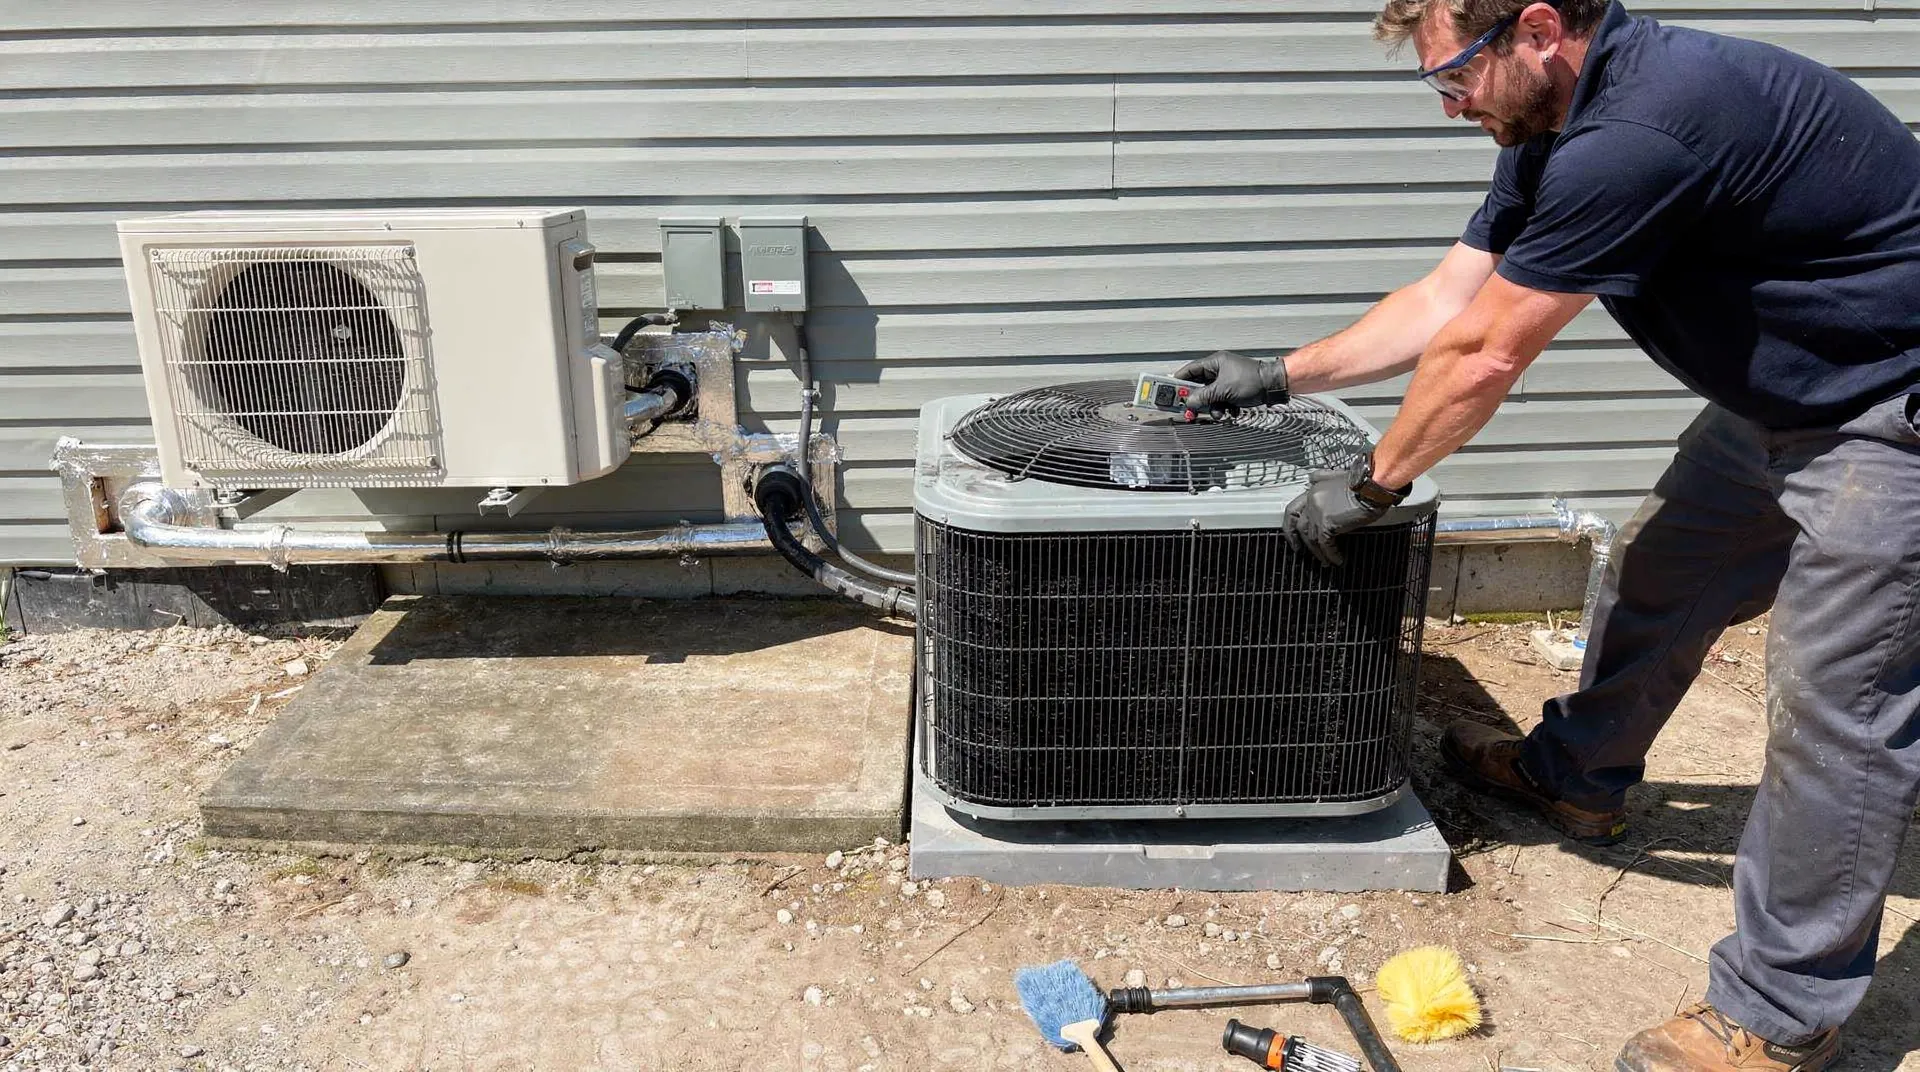
Clearing debris from the outdoor condenser unit is one of the most important regular tasks in ductless AC maintenance. A blocked condenser forces the system to work harder, shortens equipment life, and drives up energy use — all losses that a simple, consistent cleaning routine prevents. Before starting, power down the mini-split completely at the breaker — never work on a live unit. Prerequisites:
• Garden hose with a gentle spray setting
• Soft-bristle brush or fin comb
• Work gloves
• A clear, dry day
Steps to Clean the Outdoor Condenser
1. Remove loose debris. Clear away leaves, grass clippings, and dirt from around the unit by hand, maintaining at least two feet of clearance on all sides. Keeping this clearance zone free year-round is just as important as periodic cleaning, since restricted airflow around the unit adds strain even when the fins themselves are clean.
2. Brush the fins. Use a soft-bristle brush to gently loosen compacted dirt from the condenser fins, working top to bottom in straight strokes and never side to side. Side-to-side strokes bend the fins out of alignment, reducing airflow and often requiring a fin comb to straighten — an entirely avoidable step.
3. Rinse with water. Direct a gentle stream from the hose through the fins from the inside out, pushing debris outward rather than deeper into the coil. High-pressure rinsing from outside forces debris further into the fin pack, making the unit harder to clean and reducing airflow capacity.
4. Inspect the condensate line. Check that the drain line is open and unobstructed — a blocked condensate line causes leaks and odors that spread through the living space and can cause water damage to walls and ceilings over time.
5. Restore power only after the unit is fully dry. Starting the system while internal components are still wet risks electrical damage and can trip breakers or damage control boards.
How Often Should the Outdoor Unit Be Cleaned?
Seasonal checks — at minimum before cooling season and again before heating season — catch buildup before it becomes a performance problem. Keeping the outdoor unit free of debris on a consistent schedule protects both efficiency and longevity for the full life of the system.
When Should a Professional Handle Outdoor Unit Service?
DIY mini-split care covers surface cleaning well, but refrigerant levels, electrical connections, and coil condition require a trained eye. Our team at Reinhardt Refrigeration Heating and Cooling handles the deeper mini-split cleaning tasks that go beyond what a garden hose can reach — we serve residential and commercial clients throughout Duchesne, UT and are ready to help keep every component in top condition.
When Should You Call a Professional Instead?
Ductless AC maintenance splits into two clear categories: tasks homeowners handle themselves, and tasks that require a licensed professional. Skipping professional service means refrigerant problems, failing electrical connections, and degraded coils go undetected — damage that compounds quietly until the system breaks down at the worst possible moment. Manufacturers recommend professional annual maintenance as a non-negotiable baseline. A trained professional inspects refrigerant levels, cleans coils thoroughly, and checks every electrical connection — work that goes far beyond what DIY mini-split care covers. Seasonal tune-ups also evaluate coil condition and electrical components for consistent, reliable performance across every season.
What Does a Professional Mini-Split Tune-Up Actually Include?
A professional tune-up covers the three areas most likely to cause system failure: refrigerant levels, electrical components, and coil condition. Each of these requires specialized tools and factory-recommended procedures that a standard homeowner toolkit simply cannot replicate — and relying on a professional from Reinhardt Refrigeration Heating and Cooling ensures the system stays updated to manufacturer specifications, not just cleaned, but properly calibrated.
How Do You Know It's Time to Stop DIY and Call for Help?
Watch for these signs that mini-split cleaning and basic upkeep are no longer enough:
1. Refrigerant issues — reduced cooling or heating output often signals a refrigerant problem that requires professional equipment and credentials to diagnose and resolve. Attempting to handle refrigerant without proper authorization is both unsafe and can create serious compliance concerns.
2. Electrical faults — flickering operation, tripped breakers, or unusual sounds point to electrical component failure that worsens quickly without expert attention. Electrical faults in HVAC systems can create serious hazards if left unaddressed.
3. Persistent odors after cleaning — if odors return quickly after a thorough DIY clean, mold or mildew has likely reached the coil or drain pan at a depth that requires professional-grade equipment to fully remediate. Surface cleaning alone will not resolve contamination at that level.
4. Annual service interval — even when the system runs perfectly, scheduling a professional inspection every year keeps the system aligned with factory-recommended maintenance schedules and catches developing issues before they become significant problems. Our team at Reinhardt Refrigeration Heating and Cooling handles all of these service points for homeowners across Duchesne, UT.
What Mistakes Should You Avoid During Cleaning?
Skipping routine mini-split cleaning steps causes efficiency losses, shortens equipment lifespan, and leads to repairs that far outpace the effort of regular upkeep. Ductless AC maintenance done incorrectly — or not done at all — undermines the very comfort advantages these systems deliver. At Reinhardt Refrigeration Heating and Cooling, we see the same avoidable errors repeatedly from homeowners across Duchesne, UT — knowing what not to do protects your investment just as much as knowing the right steps.
What Happens When You Skip Regular Maintenance?
Neglecting routine care prevents the system from running at peak performance, and over time that neglect drives up energy consumption and accelerates wear on internal components. Small issues that a seasonal cleaning would have caught early turn into significant repairs that could have been avoided entirely with consistent upkeep.
Is DIY Cleaning Enough, or Can It Cause Problems?
DIY mini-split care handles surface-level tasks well, but mistakes during cleaning create new problems. Forcing components, using harsh chemicals on delicate coils, or reassembling parts incorrectly all compromise performance — and we recommend pairing homeowner cleaning with professional annual service from Reinhardt Refrigeration Heating and Cooling to catch what DIY routines miss.
The most common cleaning mistakes to avoid:
1. Skipping filter cleaning on a regular schedule. Dirty filters restrict airflow and force the system to work harder than necessary, steadily reducing efficiency with every passing week the filters go uncleaned. Clients who adopt a consistent four-to-six-week cleaning rhythm see a noticeable difference in both system performance and long-term reliability.
2. Using excessive water pressure on indoor components. High pressure damages fins and electrical connections inside the unit, creating new problems that require professional repair to fix properly. Always use a gentle rinse — the goal is to flush debris away, not to blast it deeper into delicate components.
3. Neglecting the outdoor unit. Debris buildup around the condenser reduces efficiency just as much as a dirty indoor head, and the outdoor unit is often the most overlooked part of a homeowner's maintenance routine. A quick seasonal check of the condenser takes only minutes and pays dividends in system longevity.
4. Reassembling panels before components are fully dry. Moisture trapped inside promotes mold growth and odors that will return quickly — sometimes within days — even after a thorough cleaning. Allowing full air-drying before reassembly is a simple step that prevents recurring odor complaints.
5. Ignoring the condensate drain line. A blocked drain causes leaks and degrades indoor air quality over time, and the blockage typically worsens slowly in a way that is easy to miss until water damage has already occurred. Checking the drain line as part of every cleaning session adds just a few seconds and avoids a much larger problem down the road.
Consistent, careful maintenance keeps ductless systems running efficiently and extends their useful life. Preventing the kind of breakdowns that disrupt comfort when you need the system most starts with the small, regular habits covered in this guide — and when a task feels beyond a basic maintenance routine, our team at Reinhardt Refrigeration Heating and Cooling in Duchesne, UT stands ready to help.
FAQ
Why does a ductless mini-split get dirty so fast?
Mini-splits draw warm room air across cold, moisture-covered coils, turning the interior into a magnet for dust, debris, and biological growth that sticks to wet surfaces. The thin filters used in ductless systems do not create the same tight seal as central HVAC filters, allowing more particulate to reach the coil directly.
What are the consequences of skipping regular mini-split cleaning?
Neglected units suffer reduced efficiency, unpleasant odors from mold spores, significant repair needs from strained components, and premature system failure before the end of their expected service life. The longer routine cleaning is deferred, the more involved and costly the eventual repair or replacement becomes.
What is the first step before cleaning a ductless mini-split unit?
Power off the unit completely before touching any component — running parts can cause injury and damage delicate components if disturbed mid-cycle. Always verify the unit is off at both the thermostat and the breaker before beginning any hands-on maintenance work.
Ready to Keep Your Mini-Split Running at Its Best?
Keeping a ductless mini-split clean is one of the simplest and most effective ways to protect your investment and maintain the comfortable indoor environment your home deserves. By staying consistent with filter cleaning, coil wiping, and drain line checks, you extend the life of the unit and keep it running at peak efficiency through every season. When a task goes beyond a basic maintenance routine — or when it is time for your annual professional service — our team at Reinhardt Refrigeration Heating and Cooling in Duchesne, UT is here to help. Schedule your service today and let us take care of the rest.
Book Expert Service Or Contact Us
Clients Say About Us
Customer Testimonials
Customers appreciate our reliable service, clear communication, and the peace of mind that comes from knowing their HVAC needs are handled by experienced professionals.
Very happy with their service. We had a different company install a heat pump for us and they totally messed everything up. Reinhardt was willing to work with us and help us out even though it was not their mistake. They were fast and fixed the issues. I appreciate their help and will use them again!
Gary H.

Thank you for your customer service.. My furnace wasn’t getting power.. There service repair man came within a couple of hours of calling and fixed the problem.. I appreciate them accommodating me so quickly..
Pearl W.
Prompt Courteous Service ! We highly recommend Reinhardt for all your HVAC needs. The Best !!!!
Mike Y.
These guys are truly truly the best. They have saved us from scorching heat (it was sure hot a couple times when the AC needed something ) and freezing cold (when fixed the heater). Can't even come close to saying how great they are!
Lynne B.
My AC went out and they were able to come the next day. Fixed in about 30 minutes. Great service.
Cody A.
Working with Paul has been great. He was prompt with his communication with me, timely in his service and fair with his price! Everything I was looking for in someone to do HVAC for my new house!
Blake J M.
I just have to say thank you to them for the work they do. Reinhardt came out when our heat pump was dripping water in places where it shouldn't. They were very courteous and prompt. Definitely a great team there and I highly recommend them.
Steven T.
I will use them for all of my hvac needs! They came and installed a new AC unit for me and they were done in an afternoon. Their pricing is fair and they were so friendly! Didn’t seem like an issue to get me in like some other companies.
Lexie R.
Ready to Transform your Home?
Pre-Qualify Without Impacting Your Credit



Related Articles